Friday, March 28, 2008
Inventor 2009
Well, the new Inventor is shipping. Keep checking back with all our blogs and find out what's hot.... and what's not. The U.S. CAD Mechanical team will be posting out favorite and not so favorite features of the new release as we take the product on a shake down cruise.
Tuesday, March 4, 2008
Frame Generator Quantities in Parts List
You created an assembly containing frames inserted with the Frame Generator.
You then created the assembly views and now you want to know how to display the quantities of different length frames in the Parts List rows (see image below).

To display frame quantities in the Parts List
1. In the Bill of Materials, click the Model Data tab.
2. On the Model Data tab, expand the Frame subassembly tree.
3. Select all the frame rows (select the first row, press and hold Shift, and then select the last row).
4. Under the Base QTY column, in one of the frame cells, click the arrow on the right.
5. In the dialog box, expand the Standard Quantity tree, select Each, and then click OK.
6. Verify that “Each” is listed in the Frame cells under the Base QTY column.
7. In the drawing file, insert the Parts List.
8. Edit the Parts List.
9. In the Column Chooser dialog box, click New Property. Create the G_L property. The new property is automatically added to the Selected Properties list.
10. Add the Standard and Stock Number properties.
11. Remove the properties that correspond to the columns you do not want display. Click OK.
12. In the Parts List dialog box, click Group Settings.
13. In the Group Settings dialog box, select the Group check box and set the G_L property as the first key.
14. Clear the Display Group Participants check box. Click OK.
15. In the Parts List dialog box, select the G_L column, and then right-click. On the shortcut menu, click Format Column.
16. In the Format Column dialog box, click the Column Format tab.
17. On the Column Format tab, enter a descriptive name in the Heading field, such as "Frame Length."
18. Click OK to close each dialog box.
Tuesday, February 26, 2008
Inventor Class
I just finished conducting an Inventor Essentials Class. And as we all know you could go 10 days and not cover all the information. We at U.S.CAD are thinking about changing the way we teach Inventor.
With that in mind, and looking at the progression Inventor has made we are going to five (5) days. This will give us more time to work on several things (sketching, unique modeling situations, etc.), and let us address in more depth other topics we have either glossed over, or not covered completely.
Let us know what you think. More details soon.
Tuesday, January 15, 2008
Style Conflict
Style Conflict When Creating a New Drawing
If your project Use Style Library project setting is set to Yes or Read only, you may see this error when you create a new drawing from your template.
If your project Use Style Library project setting is set to Yes or Read only, you may see this error when you create a new drawing from your template.
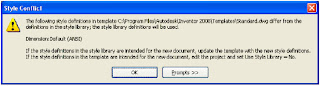
Essentially, what happens is when you start a new drawing, Inventor compares style definitions in your drawing template with the style definitions in your active style library. If Inventor finds a style definition in both locations that share the same name, but have different settings applied, this warning dialog appears and the definition from the library overwrites the local definition in your template.
This condition frequently occurs when moving from an older Inventor release to a newer one where you may have migrated your template files, but for whatever reason, have not yet migrated your style library.
There are three ways to prevent this conflict warning from appearing:
1 – Change your Use Style Library project setting to No. This is quick-and-easy, but of course, you’d be sacrificing the tools and options afforded by using the style library.
1 – Change your Use Style Library project setting to No. This is quick-and-easy, but of course, you’d be sacrificing the tools and options afforded by using the style library.
2 – OPEN your template file (don’t start a new file) and overwrite the style definitions from your library into your template file by selecting Format > Update Styles…
3 – OPEN your template file (don’t start a new file) and overwrite the style definitions from your template file into your style library by selecting Format > Save Styles to Style Library… (note that your Use Style Library Project setting must be set to Yes to execute this command).
Subscribe to:
Posts (Atom)
